6 Tips for ASP.NET MVC Model Binding
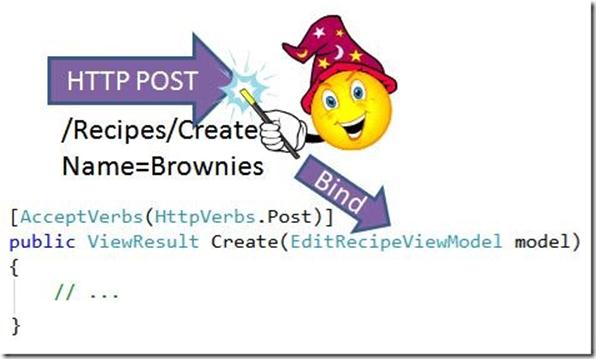
Model binding in the ASP.NET MVC framework is simple. Your action methods need data, and the incoming HTTP request carries the data you need. The catch is that the data is embedded into POST-ed form values, and possibly the URL itself. Enter the DefaultModelBinder, which can magically convert form values and route data into objects. Model binders allow your controller code to remain cleanly separated from the dirtiness of interrogating the request and its associated environment.
Here are some tips on how to take advantage of model binding in your MVC projects.
Tip #1: Prefer Binding Over Request.Form
If you are writing your actions like this ..
[AcceptVerbs(HttpVerbs.Post)]
public ActionResult Create()
{
Recipe recipe = new Recipe();
recipe.Name = Request.Form["Name"];
// ...
return View();
}
.. then you are doing it all wrong. The model binder can save you from using the Request and HttpContext properties – those properties make the action harder to read and harder to test. One step up would be to use a FormCollection parameter instead:
public ActionResult Create(FormCollection values)
{
Recipe recipe = new Recipe();
recipe.Name = values["Name"];
// ...
return View();
}
With the FormCollection you don't have to dig into the Request object, and sometimes you need this low level of control. But, if all of your data is in Request.Form, route data, or the URL query string, then you can let model binding work its magic:
[AcceptVerbs(HttpVerbs.Post)]
public ActionResult Create(Recipe newRecipe)
{
// ...
return View();
}
In this example, the model binder will create your newRecipe object and populate it with data it finds in the request (by matching up data with the recipe's property names). It's pure auto-magic. There are many ways to customize the binding process with "white lists", "black lists", prefixes, and marker interfaces. For more control over when the binding takes place you can use the UpdateModel and TryUpdateModel methods. Just beware of unintentional binding – see Justin Etheredge's Think Before You Bind.
Tip #2: Custom model binders
Model binding is also one of the extensibility points in the MVC framework. If you can't use the default binding behavior you can provide your own model binders, and mix and match binders. To implement a custom model binder you need to implement the IModelBinder interface. There is only method involved - how hard can it be?
public interface IModelBinder
{
object BindModel(ControllerContext controllerContext,
ModelBindingContext bindingContext);
}
Once you get neck deep into model binding, however, you'll discover that the simple IModelBinder interface doesn't fully describe all the implicit contracts and side-effects inside the framework. If you take a step back and look at the bigger picture you'll see that model binding is but one move in a carefully orchestrated dance between the model binder, the ModelState, and the HtmlHelpers. You can pick up on some of these implicit behaviors by reading the unit tests for the default model binder.
Scott Hanselman demonstrates a non-trivial model binder in his post "Splitting DateTime – Unit Testing ASP.NET MVC Custom Model Binders". One detail I want to call out about Scott's DateTime splitter is how you still don't need to use Request.Form when building the model. Inside the GetA method you'll see how Scott uses the binding context's ValueProvider property to fetch data. The ValueProvider represents an amalgamation of all data from the request's posted form values, routing data, and query string. Scott's example is great, but it is missing one detail – the propagation of binding errors.
If the default model binder has problems putting data into your object, it will place the error messages and the erroneous data value into ModelState. You can check ModelState.IsValid to see if binding problems are present, and use ModelState.AddModelError to inject your own error messages. See this very simple tutorial for more information on how ModelState and HtmlHelpers can work together to present validation errors to the user.
If you scroll down the comments to Scott's post you'll see Sebastien Crocquesel's patch for Scott's code. If a conversion fails, Sebastien's code will use ModelState.AddModelError to propagate the error. Both the controller action and the view can look in ModelState to see if there was a binding problem. The controller would need to check ModelState for errors before saving stuff into the database, while the view can check ModelState for errors to give the user validation feedback. One important note is that the HtmlHelpers you use in a view will require ModelState to hold both a value (via ModelState.SetModelValue) and the error (via AddModelError) or you'll have runtime errors (null reference exceptions). The following code can demonstrate the problem:
[AcceptVerbs(HttpVerbs.Post)]
public ActionResult Create(FormCollection Form)
{
// this is the wrong approach ...
if (Form["Name"].Trim().Length == 0)
ModelState.AddModelError("Name", "Name is required");
return View();
}
The above code creates a model error without ever setting a model value. It has other problems, too, but it will create exceptions if you render the following view.
<%= Html.TextBox("Name", Model.Name) %>
Even though you've specified Model.Name as the value for the textbox, the textbox helper will see the model error and attempt to display the "attempted value" that the user tried to put in the model. If you didn't set the model value in model state you'll see a null reference exception.
Tip #3: Custom Model Binding via Inheritance
If you've decided to implement a custom model binder, you might be able to cut down on the amount of work required by inheriting from DefaultModelBinder and adding some custom logic. In fact, this should be your default plan until you are certain you can't subclass the default binder to achieve the functionality you need. For example, suppose you just want to have some control over the creation of your model object. The DefaultModelBinder will create object's using Activator.CreateInstance and the model's default constructor. If you don't have a default constructor for your model, you can subclass the DefaultModelBinder and override the CreateModel method.
Jimmy Bogard has an example of sub classing the DefaultModelBinder in his post titled "A Better Model Binder".
Tip #4: Using Data Annotations for Validation
Brad Wilson explains everything beautifully in this post: DataAnnotations and ASP.NET MVC.
I encourage you to go read Brad's post, but if you are in a hurry, here is a summary:
.NET 3.5 SP1 shipped a System.ComponentModel.DataAnnotations assembly that looks to play a central role as we move forward with the .NET framework. By using data annotations and the DataAnnotationsModelBinder, you can take care of most of your server-side validation by simply decorating your model with attributes.
public class Recipe
{
[Required(ErrorMessage="We need a name for this dish.")]
[RegularExpression("^Bacon")]
public string Name { get; set; }
// ...
}
The DataAnnotationsModelBinder is also a great sample to read and understand how to effectively subclass the default model binder.
Tip #5 : Recognize Binding and Validation As Two Phases
Binding is about taking data from the environment and shoving it into the model, while validation is checking the model to make sure it meets our expectations. These are different different operations, but model binding tends to blur the distinction. If you want to perform validation and binding together in a model binder, you can – it's exactly what the DataAnnotationsModelBinder will do. You can also find samples like Automatic Model Validation with ASP.NET MVC, xVal, Castle, and a Custom Binder (John McDowall), and Enterprise Library Validation Application Block with MVC Binders (Steve Michelotti). However, one thing that is often overlooked is how the DefaultModelBinder itself separates the binding and validation phases. If all you need is simple property validation, then all you need to do is override the OnPropertyValidating method of the DefaultModelBinder.
Tip #6: Binders Are About The Environment
Earlier I said that "model binders allow your controller code to remain cleanly separated from the dirtiness of interrogating the request and its associated environment". Generally, when we think of binder we think of moving data from the routing data and posted form values into the model. However, there is no restriction of where you find data for your model. The context of a web request is rich with information about the client. A good example is another Scott Hanselman post on automatically binding the user's identity into a model see: IPrincipal (User) ModelBinder in ASP.NET MVC for easier testing.
In Conclusion
Model binding is beautiful magic, so take advantage of the built-in magic when you can. I think the topic of model binding could use it's own dedicated web site. It would be a very boring web site with lots of boring code, but model binding has many subtleties. For instance, we never even got to the topic of culture in this post.
Do you have any model binding tips?
没有评论:
发表评论